|
QUESTION - I have just replaced the brakes on my 109 and now I can not get the brakes to work on the first pump. Also not all the shoes adjust properly. ANSWER - Don't feel alone about this. Even a lot of factory trained service technicians got it wrong. In October 1970 Land Rover issued a confidential technical service bulletin (No. 1-F-9) (pdf) to explain the correct assembly to their own service techs. The infomation provided below more comprehensivly covers the content of that bulletin. To make things even more confusing around 2017 or so both Mintex and Ferodo have been supplying 109 rear brake shoes that are of a different configuration than what the NLA shoes the Land Rover factory sourced. While rear 109 brake shoes may look the same at a glance there is a leading shoe and a trailing shoe. One of the differences between the shoes is where the adjustment peg is located.
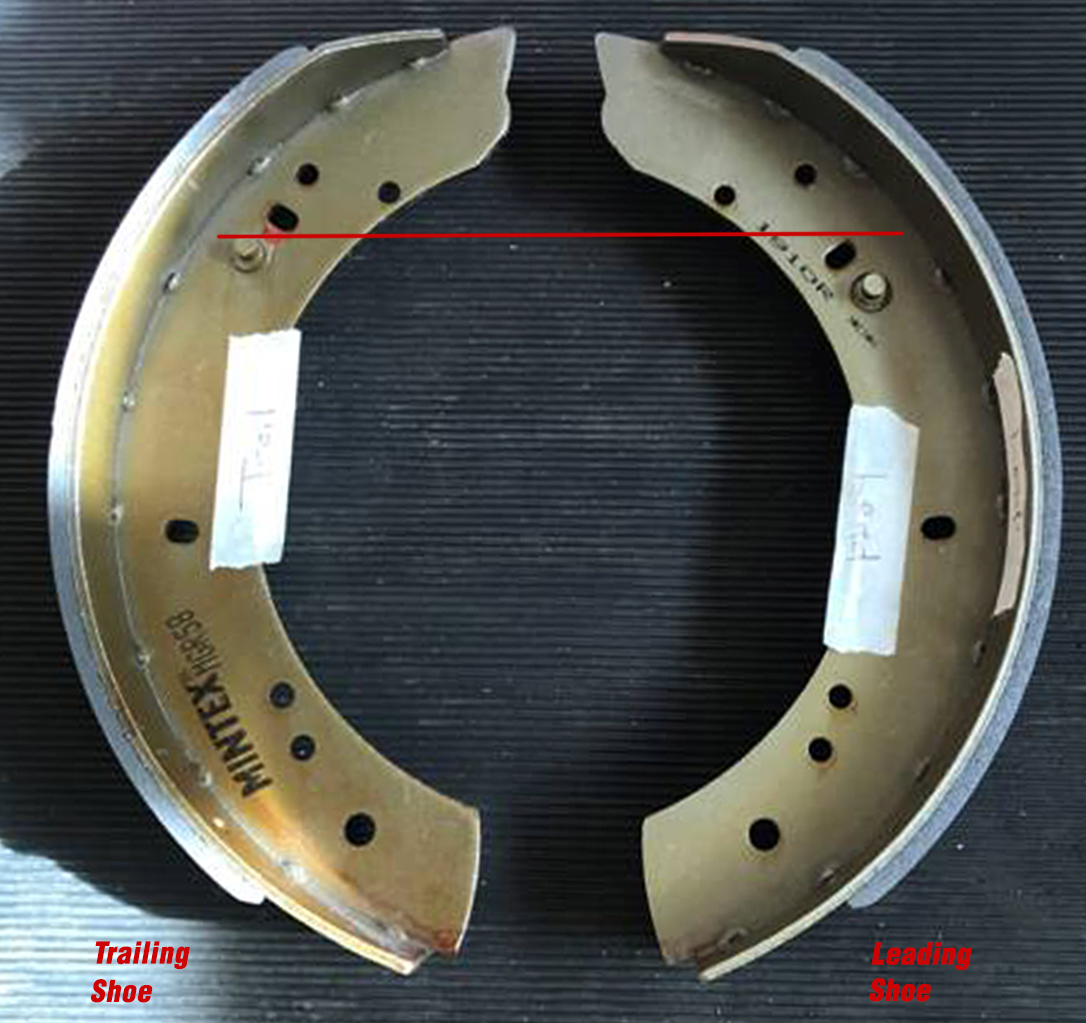
Genuine Land Rover and older aftermarket 109 rear brake shoes:Both shoes are mounted so that the tapered end is adjacent to the wheel cylinder. The leading shoe, which goes towards the front of the car, has the lining fitted so that the distance from the wheel cylinder to the shoe lining is greater than for the trailing shoe. Newer aftermarket 109 rear brake shoes:
New aftermarket 109 rear brake shoes
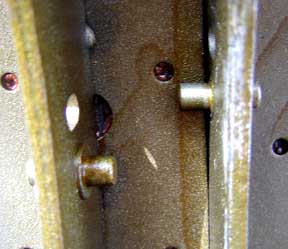
The front and rear adjusting cams are fitted in different positions on the back plate (they are not symmetrical about the centerline). The front cam works on the underside of the peg on the shoe ( in the 3 o'clock to 6 o'clock quadrant ) whereas , the rear cam works on the top of the peg ( i.e. the 9 o clock to 12 o clock quadrant ). If the shoes are fitted the wrong way around, or with two leading shoes on one side and two trailing shoes on the other, the brakes can not be adjusted properly and you will not achieve proper brake pedal height. If you have these problems after installing new shoes, pull the rear drums to make sure that the shoes are mounted properly. If you have removed the rear brake back plates or suspect that someone else has you will need to measure the plates to make sure that they are not on the wrong side. According to land Rover technical bulletin 1-F-9 the centre of the front snail cam is 4.5 inches from the centre of the hole in which the wheel cylinder fits. The center of the rear snail cam is 4.25 inches from the centre of the wheel cylinder hole. IMPORTANT TIP: Use anti seize on the threads of the flat head screws that hold the drum to the hub. Otherwise they tend to rust in place and often need to be drilled out.
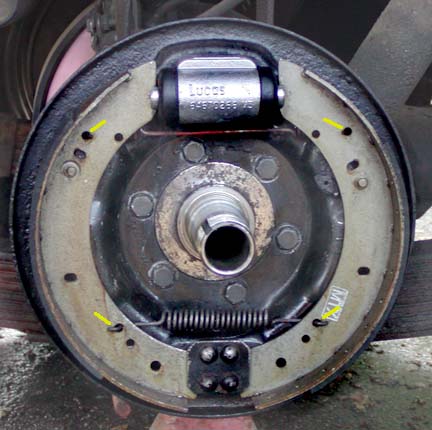
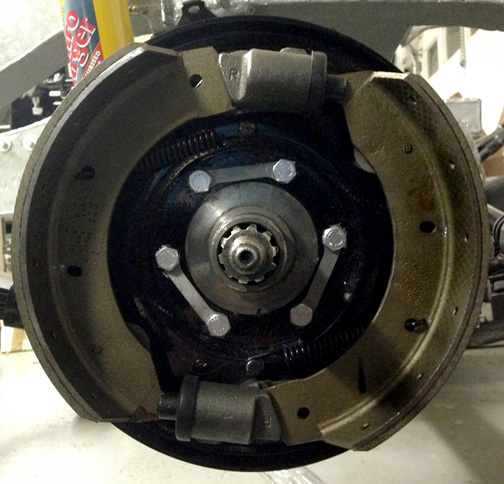
If you are here because you Forgot how everything goes together:The tapered end of both shoes go to the top by the wheel cylinder. Both springs mount on the back plate side of the brake shoes. The spring that is two short coils with a long straight section in-between mounts near the top of the shoes. The single coil spring mounts near the bottom.
Each spring goes in the same mirrored hole on each shoe. There is only one combination that will fit properly. It will be obvious if you try to assemble the springs in the wrong holes. New Mintex rear shoes average 0.3 inches thick, lining plus back plate. Back plate is 0.1 inches thick. This should allow you to mic rear brake shoes and estimate the amount of wear on the lining. If you forgot where the rear springs mount I suppose you should also see a picture of the front spring location:
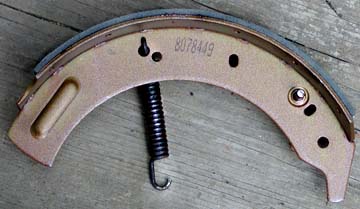
The front shoes are identical. The spring mounts through the same hole on each shoe. Spring mounts on back side of shoe. Fit spring to shoe, offer up spring and shoe to spring peg on back plate, set tapered end of shoe to brake piston slot then lever blunt end of shoe into slot at base of the other wheel cylinder. Adjust brake adjustors all the way in, tap shoes to be centred top to bottom against back plate then offer up drum. Don't forget the anti sieze on the flat head screws that hold the drum to the hub!
Six cylinder front brakes. Also used on the One Ton and the Stage 1 109s
I don't know where else put put this info yet so it is here for now: Brake configurations for different modelsSII, SIIa 109 88's up until 1980 88's after (june?) 1980 The dual master cylinder and I believe the servos as well were not standard in the UK until quite some time after they were introduced over here in NA. Also I should state that the 109's were mostly 11x2" drums except for six cylinder versions and the SIII Stage One 109 V8s which came with 11x3" drums.
|
|
If you would like to discuss any of the contents, or just say hi, please feel free to .
© 1997, 2001, 2017TeriAnn Wakeman. All rights reserved. |