|


Both the 88 and two
door 109 Land Rovers come with a single 12 gallon fuel tank under
the right front seat. There is a tool box under the left front seat. 12 gallons is not a lot for the thirsty2.25L petrol engine. Mounting gerry cans on the roof raises the vehicle centre of gravity enough to make the vehicle more tippy. placing them at the front or rear outside leaves them more vulnerable to to impacts, and of course you never want to load gerry cans inside the vehicle. Your best solution for adding fuel capacity is to do what the British military did, mount a second under seat fuel tank under the seat box. Th Land Rover factory mounted an auxiliary with the same external dimensions of the standard under seat fuel tank. The auxiliary fuel tank has has the filler cap attached directly to the top
of the fuel tank requiring you to remove the bottom cushion of the front
seat and fill this tank from the inside. However a standard front fuel tank can be used with a second outside filler with a few minor modifications.
Shopping list
- Purchase all the parts for a front right fuel tank and filler
assembly including the mounting fixings.
- Purchase a left side fuel tank outrigger which will need to be welded to the frame.
- Purchase a four inch length of two inch steel exhaust tubing plus two hose clamps.
- You will need a 2 way fuel selector. You can either use an expensive and rare Land Rover fuel selector or a generic brass 2 way fuel selector available at auto parts stores with a good brass fittings selection. This should be mounted to the front of the seat box, out of the way but within easy reach while driving.
- You will need to decide how you want to measure the fuel level. Options range from a separate fuel gauge to having a toggle switch that switches the stock gauge between two sender units
Selecting a method to measure the auxiliary fuel tank fuel level
Fuel sender units are basically variable resisters with the adjustment arm mounted to a float. The voltage going to the gauge is determined by the float level contact's location on the wire wraps on the resister. The sender unit and the gauge need to be matched. The Series Land Rover that came from the factory with positive earth (starter button on the bulkhead & push = pull switches) are have a different fuel gauge and sender unit that the ones that came from the factory with negative earth electrics (turn key start, toggle switches). Their fuel gauges and sender units are incompatible. The early positive earth type sender unit has not been available new for several decades. They have a metal tower shape protruding above the top of the mounting flange. These will only work with the fuel gauge that came on positive earth Land Rovers. The later type sending unit has a flat top with just electrical connectors sticking out above the mounting surface. This of course requires the negative earth gauge which mounts in a different place in the big gauge assembly. In order to keep the instrument panel all Land Rover you would need to obtain a large multi gauge for a factory negative earth Series IIA Land Rover to use with a new flat top sender unit. As an alternative, you can use an accessory gauge panel and a MGB fuel gauge. The MGB gauge is compatible with the negative earth Land Rover sending unit. I mounted my fuel selector valve on the front of the seat box
between the two front fuel tanks then I routed hoses to the valve from
both tanks and the fuel pump.
NOTE: When installing a fuel sender unit or draw tube you will need to seal the surfaces from fuel leakage. You can easily fill the tank so that the fuel line is above the top of the fuel tank. The mounting screw holes go through the top of the fuel tank and unless a sealer is added to the threads fuel can leak out the top of the tank past the threads. The recommended sealant is Pernatex 85420 Permashield Fuel Resistant Gasket Dressing & Sealant.
Mounting the filler tube
Obtain a complete fuel fulling assembly for a front mounted fuel tank. Next create a template for creating the mounting hole. The is best done if you have access to the vehicle the filler assembly was removed from. Place a sheet of paper at the edge of the door opening and the bottom of the galvanized side capping. Draw a line for the opening and a horizontal line where the body curves out. This will properly locate the hole you need to make in the side of your vehicle. Using the template, make a hole in the side of your vehicle. Fit the outer part, drill holes for the rivets and rivet it in place. Then mount the filler tube and screw it in place. Next a hole needs to be made in the top of the seat box for the fuel tank neck. Next I cut out the hole in the front right seat box. This may require a fuel tank trial fit or two to get the spacing correct.
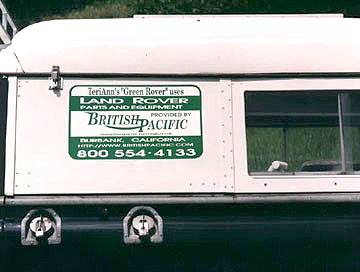
This picture shows the filler for the new left fuel tank (left)
and the 15 gallon water tank (right)
Mounting the tank
There should be rear fuel tank mounting holes
already drilled at the factory for a left side front fuel tank. They in the outrigger located near the rear of the door opening. These holes will line everything up. The fuel tank mounting flanges hang from the UNDERSIDE of the outriggers. With the help of a floor jack offer up the fuel tank to the underside of the seat box. lining up the tank and outrigger mounting holes until the filler neck hits the underside of the seat box mark the location of the filler neck. remove the tank and cut the filler neck hole in the seat box. Repeat as needed to get a good fit, remembering to leave a little extra clearance for body movement when off roading. There is a foam seal that will fit between the tank and underside of the seat box. Once you get a good fit with the rear mounts bolted on it is time to weld on the front fuel tank outrigger.. Mount the front outrigger mounting flange to the top side of the front fuel tank mounting bracket and the rear flange of the fuel tank to the underside of the rear outrigger and mark the location of the front outrigger on the side of the frame. Disassemble everything and weld in the front outrigger. Assemble the fuel tank using the factory correct fuel tank mounting hardware and remembering to put the foam seal in place before offering up the fuel tank.
The filler hose
Cut a new filler hose in half at the middle of the straight section.
Insert the four inch steel tube between the two halves effectively
extending the tube about an inch and a half. Next mount the
filler hose to the tank and filler tube, adjusting the length at
the middle cut. When it is in place tighten down all four hose
clamps then added the breather hose. And you are done.
Return to page top
|