Land
- Rover
Dormobile
2 and 4-Berth
Caravans
Operating Instructions and Maintenance
|
Land
- Rover
Dormobile
|
Dormobile Introdction > Operating Instructions and Maintenance |
|
|
|
[ These Instructions have been copied from a very fuzzy JPEG copy for readability ]
Before attempting to raise or lower the roof, always open a door or window to relieve air pressure. It is important not to handle tubes when opening or closing roof, springs should be lightly lubricated. To raise roof panel
To close roof
OPERATION OF SEATS To convert passenger seat
To convert Driver's seat
To convert rear seats
To stow rear seats to body side
To revert all seats to normal position
To reverse front passenger seats
For access to tool box and blanket box
FOR ACCESS TO GAS CYLINDER CRADLE 1.Release and remove Driver's seat completely. TO ERECT TABLE 1. Remove table
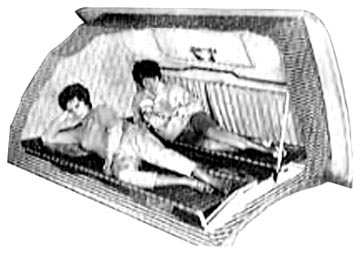
from stowage on rear door. TO OPERATE TOP BUNKS 1. Release press
studs on fabric retainer tab. OPERATION OF SINK AND COOKER UNIT The gas supply is housed beneath the diver's seat ad is connected to the cooker by flexible hose and copper pipe. There are three taps in the cooker supply: one on the cylinder, one in the locker under under the cooker ad one to operate the burner itself. The main tap in the locker should be closed when cooking is finished. The cooker grid may be removed and wrapped to prevent rattling when traveling. NOTE: Always apply light to burner before turn on the burner. As the sink waste is fed through the floor to the exterior, a waste bag or soakaway should be connected before emptying the sink. ROOF VENTILATION To prevent excessive condensation in the vehicle when standing with the roof up, open roof vent in conjunction with window in lower part of vehicle. TO REMOVE CURTAINS Unscrew small stops at ends of curtains, replace stops when replacing curtains. MAINTENANCE OF PAINTWORK Wash regularly with clean water. Use a wax polish and apply sparingly. Do not use an abrasive cleaner on the paintwork. Chips should be touched up without delay to prevent rusting. WATER CARRIERS The water should not be allowed to become stagnant, this causes discolouration to form inside the carriers. The staining ca be removed by a bleaching agent after which the water carriers should be thoroughly washed out with clean water. IMPORTANT ITEMS TO REMEMBER 1. Always turn off gas at tap in cabinet after cooking and check before retiring. 2. Always turn off gas cylinder tap before removing hose. 3. Always drain water carriers when not in use. 4.Always strap down the roof before moving off. 5. Keep roof supports and springs lightly oiled. 6. Dust off roof canopy fabric occasionally when not in use. 7. Lightly lubricate seat operational joints, door catches, and hinges. 8. Open roof ventilator when using cooker. 9. Do not empty sink until waste bag is in position. 10. Do not lubricate curtain runners. IMPORTANT - The gas installation in this vehicle has been tested with lbs ABUIBKO leak tester. Should any item be disconnected, it is important that the installation is again tested when replaced. Please note the roof ventilator should not be left open when driving at speed.
GAS BOTTLES Should the caravan be used in an extremely cold climate it is possible that the gas flow will become sluggish and even freeze in very low temperatures. Precaution against this should be taken by lagging the cradle in felt or like material. Warm water poured over the cylinder will also assist in renewing an even flow of gas. When changing a gas bottle, the regulator should be removed with the hose attached. Do not attempt to put gas bottles into floor cylinder with regulator attached, this should be attached after the bottle is positioned, then attach hose. GAZ CONTAINERS These containers can be used with CALOR or BOTTOGAS installed equipment provided a correct adaptor tap is fitted. Whilst the GAZ container is readily available in Europe, the adaptor tap may not be, and it is advisable to obtain this GAZ connecting tap No. 347 before leaving this country.
|
Return to page top |
Return to Dormobile Introduction |
Return Home |
Copyright 1996, 2004 by John Hess, 2005 by TeriAnn Wakeman and John Hess All rights reserved
|